Say Goodbye to Leftovers: The Perfect Small Batch Cinnamon Rolls Recipe
There's nothing quite like the warm, comforting aroma of freshly baked cinnamon rolls wafting through your kitchen. That classic combination of soft, sweet dough, gooey cinnamon-sugar filling, and a decadent cream cheese glaze is pure bliss. However, if you've ever found yourself with a colossal batch of cinnamon rolls staring back at you for days on end, you know the struggle is real. Who needs two dozen rolls when a cozy dozen is just perfect?
Enter the hero of our story: small batch cinnamon rolls. This ingenious approach delivers all the heavenly taste and texture you crave, without the overwhelming abundance. It's the ideal solution for smaller households, intimate brunches, or simply when a powerful craving strikes and you don't want a mountain of leftovers tempting you from the counter. Imagine gazing lovingly at a perfectly proportioned dozen of the most exquisite cinnamon rolls, knowing each one will be savored.
This recipe is designed to yield exactly twelve flawless cinnamon rolls, nestled together in a standard 9x13-inch pan. They are utterly amazing, and we're here to show you just how surprisingly easy they are to create. Forget the intimidation of yeast baking; with our guidance, you'll be a small batch cinnamon roll master in no time.
Why Small Batch Cinnamon Rolls Are Your New Best Friend
The allure of a massive baking project is undeniable, but sometimes, practicality wins. While there's certainly a time and a place for a Fluffy, Gooey & Easy: Your Guide to Perfect Small Batch Cinnamon Rolls, the benefits of opting for a smaller batch are truly compelling:
- No Waste, No Guilt: The most obvious advantage is eliminating food waste. You get to enjoy fresh rolls without the pressure of eating them all before they lose their peak freshness.
- Always Fresh: A smaller batch means you can bake them more frequently, ensuring that every roll you enjoy is as fresh and warm as possible, often straight from the oven.
- Perfect for Any Occasion: Whether it's a quiet Sunday morning with a cup of coffee, a small family gathering, or a treat for a few friends, twelve rolls are perfectly suited. You get that bakery-style comfort without the overwhelming scale.
- Manageable & Less Intimidating: For novice bakers, or those simply short on time, a smaller recipe feels less daunting. Less dough to handle, fewer ingredients to measure, and a quicker process overall can make baking a joyous experience rather than a chore.
- Satisfy Cravings Efficiently: When that cinnamon roll craving hits, you want satisfaction, not a multi-day commitment. This recipe delivers that instant gratification, providing just enough to hit the spot. If you're ready to Satisfy Your Cravings: Make 12 Perfect Small Batch Cinnamon Rolls, you're in the right place!
Mastering the Dough: The Heart of Perfect Small Batch Cinnamon Rolls
The secret to truly exceptional cinnamon rolls lies in the dough. It needs to be soft, pliable, and perfectly hydrated to achieve that signature fluffy, tender texture. For this small batch cinnamon rolls recipe, we'll primarily use a stand mixer fitted with a dough hook, which makes the process incredibly easy.
Focus on the Feel, Not Just the Flour Amount
One of the most crucial tips we can offer is to pay close attention to the feel of your dough rather than obsessing over the exact flour measurement. Flour amounts can vary slightly based on humidity, brand, and how you scoop it. Your goal is a dough that:
- Is soft and smooth to the touch.
- Forms a cohesive ball that pulls away from the sides of the bowl.
- Is no longer sticky, leaving minimal residue on your fingers.
- Is still wonderfully stretchy and soft when gently pulled.
If your dough feels too dry and stiff, it's likely over-floured, which will result in tough, dry rolls. If it's too sticky and shaggy, it needs a tiny bit more flour to achieve the right consistency, preventing dense, doughy rolls. Trust your intuition and the tactile feedback from the dough itself.
The First Rise: Developing Flavor and Texture
Once your dough has reached its ideal texture, place it in a lightly greased bowl, turning it once to coat, then cover it. This is where the magic of yeast truly happens. Let the dough rise in a warm, draft-free spot until it's noticeably puffy and approximately doubled in size. The exact timing can vary significantly depending on your kitchen's temperature:
- In a warm kitchen (around 75-80°F / 24-27°C), this might take 1 to 1.5 hours.
- In a cooler environment, it could take a bit longer.
A good visual cue is to gently press a floured finger into the dough; if the indentation remains, it's ready.
Rolling, Filling, and Shaping for Success
With your beautifully risen dough, the next steps are all about crafting those iconic spirals and ensuring a perfectly balanced filling.
Prepping Your Workspace and Dough
Gently punch down the risen dough to release the air, then turn it out onto a lightly greased countertop. We recommend using a nonstick cooking spray rather than flour here. Why? Using too much extra flour at this stage can lead to dry, less tender rolls. The slight greasing helps prevent sticking while keeping the dough soft and pliable.
This particular dough is remarkably easy to work with. You might even find, like many experienced bakers, that you don't need a rolling pin! Simply use your hands to pat the dough into a roughly 14x10-inch rectangle. Its malleability makes it very responsive to shaping.
The Irresistible Filling
Now for the star of the show: the cinnamon-sugar filling. Evenly spread about 6 tablespoons of softened (but not melted!) butter across your dough rectangle, leaving a small border along one long edge. In a separate bowl, combine your brown sugar and a generous amount of ground cinnamon. Some recipes also include a small amount of flour in the filling; this isn't strictly necessary for flavor, but it can help absorb excess moisture from the butter and melted sugar during baking, preventing the filling from completely oozing out and ensuring a gooier center.
Liberally sprinkle this aromatic mixture over the butter, making sure to get good coverage. Don't be shy!
The Art of Rolling and Cutting
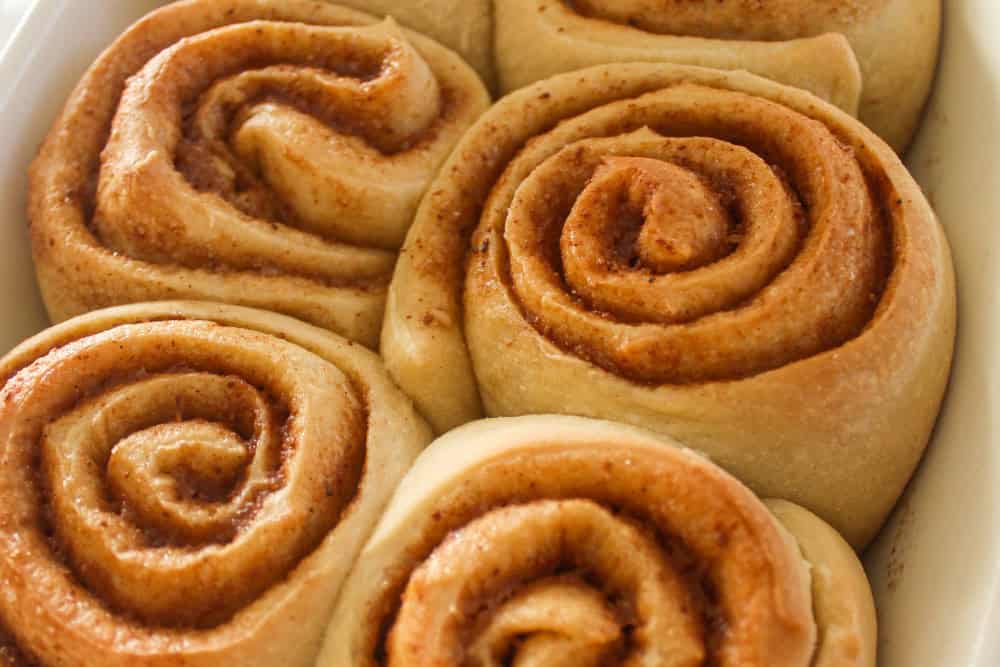
Starting from one of the long ends (the one opposite your small border), begin to roll the dough up tightly. This is a critical step for achieving those beautiful spirals and preventing gaps. The key is to roll as snugly as possible without actually stretching or pulling the dough. Stretching the dough during this process can cause the rolls to shrink awkwardly in the oven and result in those dreaded gaps between layers once baked and cooled.
Once your dough is rolled into a tight log, it's time to cut it into 12 equal pieces. For clean, precise cuts that maintain the roll's shape, a serrated knife (using a gentle sawing motion) or even a piece of unflavored dental floss or thread works wonderfully. Simply slide the floss under the log, cross the ends over the top, and pull to slice through.
Lightly grease your 9x13-inch baking pan with cooking spray and carefully arrange your cute, unbaked rolls evenly within the pan. A pro tip: gently tuck the "tail" or loose end of each roll underneath to help it stay secure during baking.
The Final Touches: Rise, Bake, and Glaze
You're almost there! The final stages bring your small batch cinnamon rolls to life, transforming them into golden, fragrant masterpieces.
The Second Rise (Proofing)
Cover your pan of neatly arranged rolls and let them undergo their second rise. This usually takes 30-45 minutes in a warm spot. They should look noticeably puffy and have grown to fill the pan, snuggling up to each other. This proofing stage is vital for a light, airy texture.
Baking to Golden Perfection
Preheat your oven to the recommended temperature (typically around 375°F / 190°C). Bake the cinnamon rolls until they are beautifully golden brown on top and cooked through in the center. This usually takes between 20-25 minutes, but keep an eye on them. An internal temperature of about 200-205°F (93-96°C) indicates they are done, but visual cues are often sufficient. Avoid overbaking, as this can dry out your precious rolls.
The Crowning Glory: Cream Cheese Glaze
While your rolls are still warm (but not piping hot), prepare your favorite cream cheese glaze. A classic recipe typically involves softened cream cheese, butter, powdered sugar, vanilla extract, and a splash of milk or cream. Whisk until smooth and creamy. The warmth of the rolls will allow the glaze to melt slightly, seeping into every crevice and creating an irresistible finish. Drizzle or spread generously – you deserve it!
There you have it! A perfect dozen of tender, gooey, and utterly delicious small batch cinnamon rolls, ready to be enjoyed without the worry of excessive leftovers. This recipe proves that you don't need a massive undertaking to create a truly special treat. With a little attention to detail, especially with the dough's consistency and rolling technique, you'll be baking bakery-quality rolls right in your own kitchen. Enjoy the comfort, the aroma, and the pure satisfaction of a perfectly proportioned indulgence!
